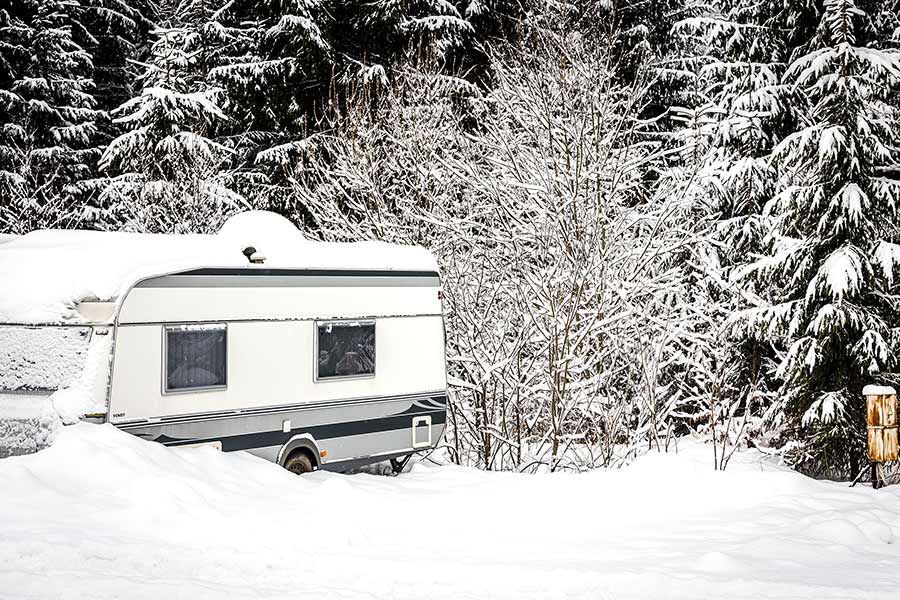
RVing is a great way to see America. During the fair-weather months, RVers of all sorts can be found camping and exploring throughout the land, from the beautiful rocky shores of New England to the deserts of Utah to the green fields of the midwest. But when it comes to winter months, RVs need to be stored properly — so should you remove your batteries for winter?
In most cases, you should remove and store your camper batteries over the winter months. When storing your camper for any length of time, it’s a good idea to take the batteries out and connect them to a smart charger; this will keep your batteries charged and in top shape.
So why winterize your batteries? What are the best ways to prepare your camper’s electrical system for the chilly winter months? What happens if you just leave your batteries in over the winter? After reading this post, you will have the answers to all these questions and more.
How Winter Affects Batteries
The batteries most used in RVs are known as flooded lead-acid batteries (FLA). Lead-acid batteries have several battery cells inside them that are connected in series, which means that the total output of the battery is found by adding up the output of each cell. A 12-volt battery, for example, might have six individual battery cells that each produce 2 volts, for a total of 12 volts.
How do batteries work? Lead-acid battery cells are composed of positive and negative plates submerged in an electrolyte-generating sulfuric acid solution. When an electrical load crosses the battery terminals, the electrolyte solution makes positive hydrogen ions and negative sulfate ions, which then flow to the positive and negative plates. More chemistry happens, and voilà, surplus electrons flow out into the circuit that the battery is connected to. If you’d like a more detailed explanation, MIT has a great explainer on how batteries work.
During storage, flooded lead-acid batteries can freeze when not fully charged. If the electrolyte solution freezes, it will expand, leading to a cracked battery case, which can ruin your battery and cause a corrosive acid leak. A fully charged battery is good to around minus 80 degrees Fahrenheit, not likely to freeze and break. However, a depleted battery is susceptible to freezing at approximately 20 degrees Fahrenheit, so before storing your batteries for winter, be sure to charge them fully.
Leaving Your RV Plugged In During the Long Winter Months
Leaving your RV plugged in might seem like a great idea, but it can backfire unless your RV has a smart inverter charger that will sense the battery’s voltage and not overcharge. Otherwise, you run the risk of overcharging your battery, which can drain the cell’s electrolyte levels, causing battery damage leading to reduced battery life or even starting a fire — neither of which is an acceptable outcome.
Do you still need to take your batteries out and store them over the winter if you live somewhere that your batteries won’t freeze? Probably a good idea. Always-on systems like propane leak detectors and other parasitic drains in the electrical system continuously pull energy from your RV battery. If your RV is sitting for a prolonged period, these systems can drain the battery and cause a condition called sulfation, where the battery plates become contaminated with crystals.
Sulfation can ruin your battery, so it’s a good idea to remove your batteries even if you’re not going to be experiencing a heavy winter.
Alternatively, you could plug the RV in once a month for 8-10 hours to ensure your batteries don’t become depleted; this may or may not be a viable option depending on where the RV is stored. In addition to remembering to do it each month.
Removing the Batteries
The first step is to disconnect your RV batteries. You’ll want to turn off everything in the RV first, then locate the battery compartment. Before you remove anything, mark the positive and negative battery terminals. Usually, the side with the black lead is positive, and the side with the white lead is negative. In addition, you can check for a + (positive) and – (negative) on the battery.
Van Camping Life Tip: If you have multiply batteries, use your phone to take a couple of photos for a visual record of the battery connections, then when it is time to reinstall, you can refer to the images.
To remove the battery, you’ll need the following items:
- Safety goggles
- Rubber gloves
- Screwdriver
- Socket wrench
- Combination wrenches
Before You Start, Remember Safety First
- Always wear safety goggles and gloves. Battery acid is highly corrosive and can damage the skin and especially the eyes.
- Lead-acid batteries are heavy. Use proper lifting procedures and make sure you have a secure grip on the battery when removing it.
- Careful when disconnecting. When removing the positive lead, accidentally contacting the wrench to the grounded frame or the negative terminal will cause an arc.
Most batteries are in a case or frame that needs to be disconnected or unscrewed to let you remove the battery. Remove the negative (white) lead first, and the positive (black) lead second. Once the leads are removed, you can remove the battery out of the compartment.
Clean Your Battery
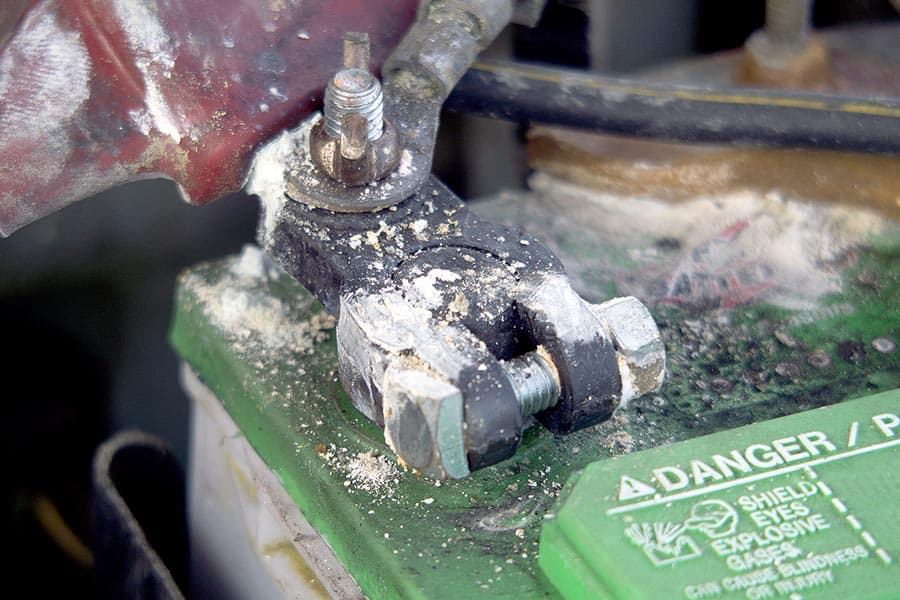
Next, you should clean your battery: it may have some corrosion or be covered with dust and debris. The easiest way to clean your battery is to mix 1 tablespoon of baking soda with 1 cup of hot water. Apply the solution on the corroded areas and use an old toothbrush to scrub it, then use a rag to wipe it clean. Cleaning your battery helps prevent further corrosion and avoid introducing any foreign materials into the electrolyte solution.
You can use a battery terminal cleaning brush to clean the inside of the terminals, twisting back and forth until the inside is shiny and clean. Next, push the open end of the brush over each battery post and twist back and forth until the post is shiny and clean.
Note: When it’s time to reinstall the batteries, using inexpensive anti-corrosion battery washers will help prevent corrosion from forming on the terminals or use a spray-on battery terminal protector to coat the terminal surfaces and help prevent them from corrosion build-up.
Now that your battery is clean, it’s time to check the water level. Over time, some of the water in the electrolyte solution can evaporate out. Remember to wear rubber gloves and eye protection (the battery acid is highly corrosive and can damage skin and eyes, so please use protective gear) and open up the labeled covers on your battery.
There should be a fill-level indicator inside the compartments. If the fluid level is below the indicator, use distilled water to refill the compartments. Distilled water has fewer minerals in it, so it’s better for the battery; tap water or bottled water may have minerals that can accumulate in your battery.
Storing Your Battery
After this maintenance, your battery is ready for charging and storage. You’ll want to attach it to a battery maintainer to charge the battery fully and to keep the charge level adequate over the storage period. If you don’t use a battery maintainer, you need to check your charge monthly to ensure your batteries don’t become depleted while in storage.
Other Posts of Interest
- Do Camper Trailers Have Electric Brakes?
- What Is The Cheapest Class B RV?
- Can I Take My Dog Camping? (+Things To Know Before You Go)
- What Is An Inverter In A Camper Van?
Where Should I Store My RV Batteries?
Your RV batteries should be stored somewhere warm and dry. Your garage or basement should be OK; a shed or outbuilding can work too, as long as it doesn’t get too cold inside the building. Also, don’t store your battery on the cold floor: place it on a piece of plywood, some cardboard, or inside a battery box. Finally, don’t store your battery near flames, sparks, or heat sources.
What is the Difference Between a Battery Maintainer and a Battery Charger?
A battery maintainer senses when the battery is fully charged and will switch over to float mode, maintaining a full charge, and only charge the battery when the voltage drops below a certain level. On the other hand, a battery charger is designed to charge batteries up very quickly.
When storing batteries, you should use a battery maintainer and not a battery charger; a prolonged connection to a battery charger can overcharge your battery and cause damage or a fire. However, some chargers are equipped with a maintenance feature to prevent overcharging, and some aren’t.
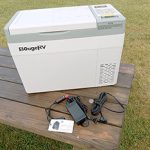
The NOCO Genius10 Smart Charger is an easy way to keep your camper battery in tip-top shape. The NOCO Genius 10 works with most 6 and 12-volt batteries. In addition, it has an integrated thermal sensor that prevents over and under-charging depending on the temperature.
This small package has everything all wrapped up in one convenient to use product:
- Battery maintainer
- Battery charger
- Trickle charger
- Battery Desulfator
The NOCO Genius10 is lightweight and powerful, the perfect solution to keep your battery working at its best, and a great way to help your battery last longer.
The Optima Digital 400 12-volt battery maintainer and charger can easily extend overall battery performance and life. In addition, the Optima Digital 400 can bring back run-down batteries when other chargers aren’t able to do so.
- Charges
- Conditions
- Maintains
- Extends battery life
Easy to operate, features spark-free connection, LCD screen, and allows you to set the battery type quickly. It has a limited three-year warranty. No garage is complete without this charger!
Is a Battery Maintainer the Same as a Trickle Charger?
A battery maintainer is not quite the same as a trickle charger. The key difference is that a trickle charger is designed to continuously apply a low electrical current to batteries at about the discharge rate, thus keeping the batteries at a relatively constant charge. A battery maintainer has a charge sensor in it, and it will stop delivering charge to the battery when the battery becomes full.
Can You Use a Trickle Charger on an RV Battery?
It is OK to use a trickle charger on an RV battery. Trickle chargers provide a small amount of electricity to the battery to keep it from depleting. It’s pretty easy to use a trickle charger: most modern units just need to be plugged in and connected to the batteries. You may need to set voltage or amperage settings; your trickle charger’s user guide or owner’s manual can explain the specifics.
Battery maintainers are a little smarter than trickle chargers and can be left unattended for much more extended periods. Trickle chargers tend to be less expensive than battery maintainers and should be disconnected when they finish charging. Either option is appropriate when you’re storing your RV batteries.
How Long Will an RV Battery Last?
Several factors contribute to a battery’s life span:
- How they’re used
- How they’re discharged
- How they’re recharged
- How they’re stored
With proper maintenance, RV batteries should last for a minimum of at least six years. However, many RV batteries do not get proper maintenance. Taking the time and energy to remove your batteries and ensure they’re appropriately stored will help extend their life. In addition, taking good care of your equipment means your equipment will be able to take good care of you.
Even with the best care, RV batteries will eventually die and need to be replaced. Signs that your RV batteries need to be replaced include swelling or bulging of the battery case, leaking fluids, or complete depletion of the electrolyte solution. Also, if the terminals are extremely corroded or there is discoloration of the battery, you should get a new battery.
All Charged Up and Ready To Go
RVing is a superb way to travel the nation, get outdoors, and experience new things. Part of being a happy camper is ensuring that your camping equipment is properly maintained and taken care of.
Maintaining your RV batteries may not be the most exciting part of RVing, but it’s an important maintenance step that will keep you and your camper happy wherever you go. So when you’re putting your camper to bed for the winter, take the time to remove and properly store the batteries. You’ll be happy you did when it comes time to hit the road again!